You need configuration notes or a switch integration worksheet to perform
the steps in this section. This section includes steps for the following
processes:
Install Additional Language Software
The language packages, also called announcement sets, allow system
users to hear voice prompts and system announcements in other languages.
The system is shipped from the factory with the following language packages
installed:
- US English
- English TDD (for teletype (TTY) machines)
Adding language software causes the voice system to stop. Plan to do
the installation during low usage hours.
Use the INTUITY AUDIX LX Languages CD to install additional announcement
sets:
- Log on as craft (for a new installation) or sa (if restoring a system).
The sa default password is sapasswd.
- From the web-based Administration Main Menu, select:
Utilities
     Software Management
          Software Installation
- Follow the on-screen instructions to insert the CD.
- Click CD (or another installation media if applicable).
- The system warns you that system data should be backed up. If necessary
perform a system backup. If the system is new, no data needs to be
backed up.
- Click Continue Operation.
The system displays a list of packages available on the CD, either
software packages or additional language sets depending on which CD
you have inserted. Packages that have already been installed are marked
with "=".
- Select the language packages you want to install.
- Press PageDown to see the bottom of the page, then click Install
selected packages.
The system displays a list of packages to be installed.
- Review the list, then click Proceed with installation.
The system begins the installation and displays installation status
messages. The installation is complete when the pointer changes from
a wristwatch to an X.
- After the software is installed, press PageDown to see the bottom
of the status page.
- If all software was installed successfully, remove the CD from the
CD drive.
- Click Restart the System.
- After the system restarts, press Enter to return to the prompt,
and log in.
- From the web-based Administration Main Menu, select:
Utilities
     Software Management
          Start Messaging System
- If the system is to be shipped, stop the voice system and power
off the system. If the system is to be administered now, go to Install
Switch Integration Software.
Install Switch Integration Software
Install one of the two switch integration packages. The system default
is that no switch integration package is installed. The two choices
are:
- OverLAN Switch Integration
- Inband Switch Integration
You can only have one switch integration software package installed
on the system at one time. If one package is already installed and you
want another, you must remove the first package before installing the
second package.
- Log on as craft (for a new installation) or sa (if restoring a system).
The sa default password is sapasswd.
- From the web-based Administration Main Menu, select:
Utilities
     Software Management
          Software Installation
- Switch Integration software is included on the main INTUITY AUDIX
LX software CD. Obtain the CD, then follow the on-screen instructions
to insert the CD.
- Click CD (or another installation media if applicable).
- The system warns you that system data should be backed up. If necessary,
perform a system backup. If the system is new, no data needs to be
backed up.
The system displays a list of packages available on the CD, including
the two switch integration packages: OverLAN and Serial-Inband.
- Select the switch integration package you want to install. If you
know which type of switch integration you plan to do, based on configuration
notes, select the corresponding software package. You can only have
one switch integration software package installed on the system at
one time.
- Press PageDown to see the bottom of the page, and click Install
selected packages.
The system displays a list of packages to be installed.
- Review the list, then click Proceed with installation.
The system begins the installation and displays installation status
messages. The installation is complete when the pointer changes from
a wristwatch to an X.
- After the software is installed, press PageDown to see the bottom
of the status page.
- If the software was installed successfully, remove the CD from the
CD drive.
- Click Restart the System.
After the system restarts, it displays the message:
Press Enter to return to prompt...
- Press Enter, then log in.
- If the system is to be moved or shipped, stop the voice system and
power off the system. If system data is to be restored, go to Performing
a Restore. If the system is to be administered now, go to the
next section.
Select the Switch Integration
When the appropriate switch integration software package is installed,
select the switch integration type:
- From the web-based Administration Main Menu, select:
Basic System Administration
     Switch Selection
The system displays the Switch Selection page with a drop-down list
of switch configurations. The list varies depending on which switch
software package you installed.
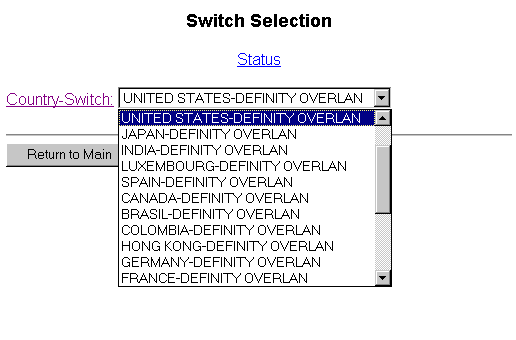
- Click on the drop-down list and select the switch and country that
matches the customer site.
- Click Save.
The system displays a confirmation message and also a message that
says you need to stop and start the Voice System.
- Stop and start the Voice System.
Top of page
