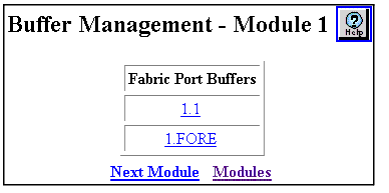
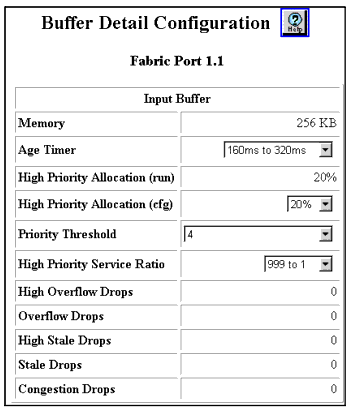
Table�179:�Buffer Detail Configuration Parameters �
| Parameter |
Description |
| Memory |
Displays the amount of physical memory associated with this buffer. |
| Age Timer |
Displays the amount of time a packet remains in the queue before being discarded as a stale packet. You may want to increase the timer value for ports connected to 10 MB/s ports, particularly 10 MB/s shared media, because you may want to queue packets longer before discarding them. |
| High Priority Allocation |
Displays the percent of the buffer's queuing space allotted to high priority traffic. Because the high-priority queue is serviced more frequently than the normal priority queue, raising this value may not necessarily provide better service. In fact, if you are using the high-priority queue for delay-sensitive traffic, you may want to reduce the amount of memory devoted to the high-priority queue. This ensures that packets that cannot be delivered in a timely manner are discarded. If you want the high priority queue to guarantee delivery of as many packets as possible, regardless of delay, increase this value. The change does not take effect until you reset the switch. |
| Priority Threshold |
Allows you to set this parameter to the value at which the switch starts sending packets to the high-priority queue. The default value (4) causes all traffic with a priority greater than or equal to 4 (4, 5, 6, and 7) to be assigned to the high-priority queue. Priority schemes have more than two queues (the IEEE allows up to 8, numbered 0 through 7). Avaya recommends that you do not change this parameter. |
| High Priority Service Ratio |
Allows you to set how many times the high priority queue is serviced for each time the low priority queue is serviced. The ideal value changes from queue to queue, but the goal is to ensure that traffic mix guarantees optimal mix between high-priority and best effort traffic. |
| High and Normal Overflow Drops |
Displays the number of packets dropped because the associated buffer is full. Indicates that the device immediately before the queue is processing traffic faster than the next downstream element can process the same volume of traffic. For example, overflow drops on the input buffer indicate that traffic is arriving faster than the switch matrix can process it. Overflow drops on the output buffers indicate that the output port cannot handle the volume of the load being offered. |
| High and Normal Stale Drops |
Displays the number of packets dropped because they timed out waiting for service (using the age timer value). In the high-priority queue, this can help determine how efficiently the switch is processing "better never than late" traffic. Excessive stale drops on the high-priority queue may indicate the need to increase the service ratio on the high-priority queue. |
| Congestion Drops |
Displays the number of packets dropped because the switch controller has sensed congestion at the outbound port. |
|