Web Agent Procedure
To create IPX static routes using the Web Agent:
- In the navigation pane, expand the Routing > IPX > Configuration folders, and then click Static Routes.
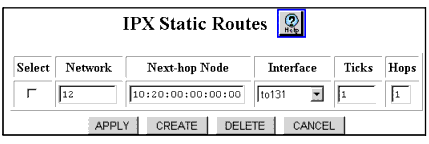
The IPX Static Routes Web page is displayed in the content pane. See Figure�166.
Figure�166:�IPX Static Routes Web Page

- To create a new IPX Static Route, click CREATE.
Note: Only the create button is shown if no IPX Static Routes are configured.
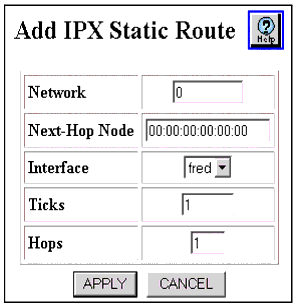
The Add IPX Static Route Web page is displayed. See Figure�167.
Figure�167:�Add IPX Static Route Web Page

- See Table�118 to configure the IPX Static Route parameters.
Table�118:�IPX Static Route Parameters �
| Parameter |
Description |
| Network |
Enter the IPX network number that you want to assign to the IPX static route. |
| Next-Hop Node |
Enter the MAC address for the next destination to which the packet is routed. Format of the value to enter is aa:bb:cc:dd:ee:ff. |
| Interface |
View the IPX Interface associated with the next hop. |
| Ticks |
Enter the amount of time (in ticks) that the packet takes to reach the network number you specified. A tick is approximately 1/18th of a second. |
| Hops |
Enter the number of routers (hops) that the packet must pass through before reaching the network number associated with the IPX network. |
|
- Click APPLY to save your changes, or CANCEL to restore previous settings.
- To view or modify IPX Static Routes, expand the Routing > IPX > Configuration folders in the navigation pane, and then click Static Routes.
The IPX Static Routes Web page is displayed in the content pane. See Figure�168.
Note: It is also possible to create a static route by, making a RIP source route from the IPX Static Route Table.
Figure�168:�IPX Static Routes Web Page


