Web Agent Procedure
To create a trusted RIP neighbor using the Web Agent:
- In the navigation pane, expand the Routing > IP > RIP folders, and then click Trusted Neighbors.
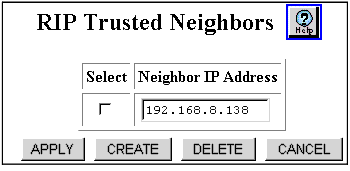
The RIP Trusted Neighbors Web page is displayed in the content pane. See Figure�143.
- If a RIP Trusted Neighbor hasn't been configured, only the CREATE button appears in Trusted Neighbor Web page.
Figure�143:�RIP Trusted Neighbors Web Page

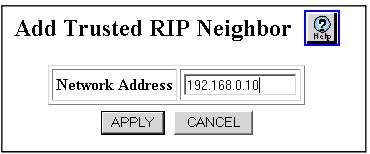
- Click CREATE. The Add Trusted RIP Neighbor Web page is displayed. See Figure�144.
- Click on the Select column check box for the Trusted Neighbor and click on APPLY to save your changes
- Click on the Select column check box for the Trusted Neighbor and click on DELETE to delete the entry or CANCEL to restore previous settings.
Figure�144:�Add Trusted RIP Neighbors Web Page

- Enter the IP address for the node that acts as the trusted RIP neighbor in Network Address field.
- Click APPLY to save your changes, or CANCEL to restore previous settings.

