Web Agent Procedure
To create a self-signed certificate:
- In the navigation pane, expand the System > Administration > Security > SSL folders.
- Click Certificates. The SSL Server Certificate Web page is displayed in the content pane. See Figure�40.
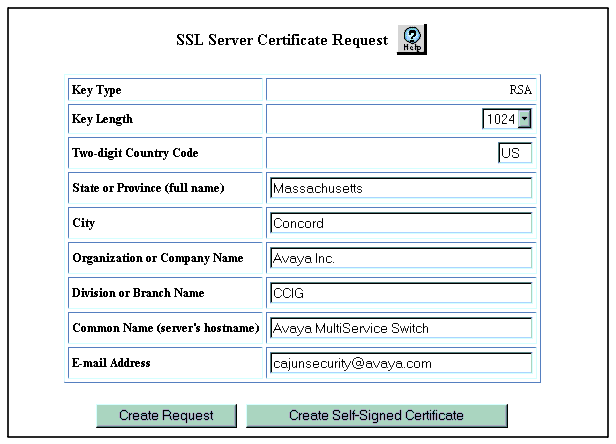
- Click Certificate Request. The SSL Server Certificate Request Web page is displayed in the content pane. See Figure�39.
Figure�39:�SSL Server Certificate Request Web Page

- Enter the appropriate information in the following fields:
- Key Type--RSA only.
- Key Length--Select the length of the key. Options are 512 or 1024 bits.
- Two-digit Country Code--Enter your country code.
- State or Province (full name)--Enter your state or province.
- City--Enter the name of your city.
- Organization or Company Name--Enter your organization or company name.
- Division or Branch Name--Enter the name of your company's division or branch.
- Common Name (server's hostname)--Enter a common name for the server. Use either the fully qualified domain name (FQDN) or the IP address of the switch.
- Email Address--Your e-mail address.
- Click Create Self-Signed Certificate.
- Restart SSL for the new certificate to take effect. For information on how to restart SSL, see "Restarting SSL/HTTPS" later in this chapter.
