Creating Hunt Groups
Web Agent Procedure
To create a hunt group:
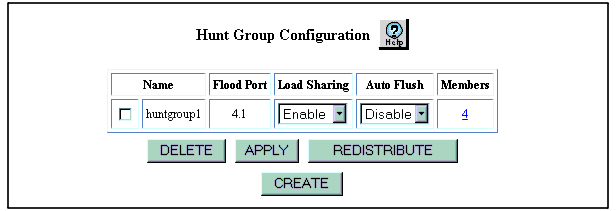
- In the navigation pane, expand the L2 Switching folder, and then click Hunt Groups. The Hunt Group Configuration Web page is displayed in the content pane. See Figure�51.
Figure�51:�Hunt Group Configuration Web Page
- Click CREATE. The Create Hunt Group Web page is displayed in the content pane. See Figure�52.
Figure�52:�Create Hunt Group Web Page
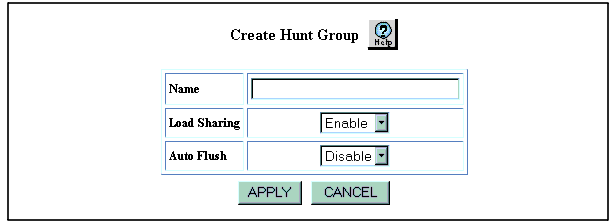
- In the Name field, enter a name for the hunt group. This field accepts a maximum of 31 alphanumeric characters.
- In the Load Sharing field, select Enable.
- In the Auto Flush field, select Enable if you want to enable the auto flush feature for the ports participating in the hunt group. The default setting for this field is Disable.
When you enable auto flush for a hunt group, all AFT entries that were learned on the hunt group are marked invalid if the links to all of the hunt group ports fail. Once the AFT entries are marked invalid, they can be learned on a redundant port. When auto flush is enabled, failover to a redundant port occurs much sooner.
- Click APPLY to save your changes, or CANCEL to restore previous settings.