Web Agent Procedure
To configure a DNS client by using the Web Agent:
- Select DNS from System > Administration group on the Web Agent window. The DNS Configuration dialog box opens (Figure 11-1).
Figure 11-1. DNS Configuration Dialog Box
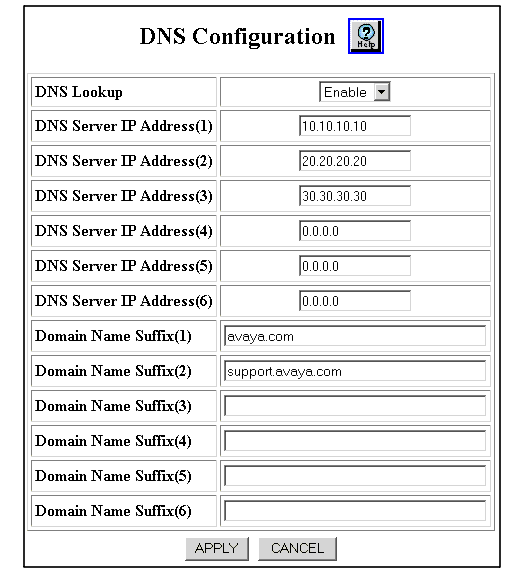
- Select Enable from the DNS Lookup field pull-down menu to enable DNS on the switch.
NOTE: When DNS is enabled and configured, you can enter DNS names in place of IP addresses for the following CLI commands. Again, DNS is for use with the CLI only for testing connectivity and copying files from TFTP servers, not the normal operation of the Avaya Multiservice switch.
- ping
- telnet
- connect
- trace (traceroute)
- copy tftp
- Enter the DNS server IP address for each DNS server in the DNS Server IP Address fields (fields 1-6).
- Enter the domain name suffix for each DNS server in the Domain Name Suffix fields (fields 1-6).
- Click APPLY to save your changes, or CANCEL to restore previous settings.