|
|
|
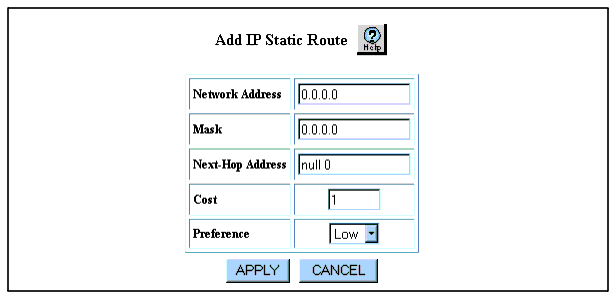
To create IP static routes using the Web Agent:
Figure 12-6. Add IP Static Route Web Page

| Field |
Explanation |
|---|---|
| Network Address |
Enter an IP network address for your IP static route. |
| Mask |
Enter an IP subnet mask for your IP static route. |
| Next-Hop Address |
Enter an IP address for the gateway associated with the IP static route. The default setting is null 0, which creates a discard route. For information on creating a discard route, see “Creating a Static Route to a Null Interface.” |
| Cost |
Enter the metric between this router and the destination. |
| Preference |
Select a low or high routing preference from the Preference field pull-down menu. Preference overrides cost. If two routes of the same preference are present, the switch uses the route that has the lower cost. |
|
|
|