|
|
|
To display, modify, delete a previously created IP interfaces or to create a new IP interface using the Web Agent:
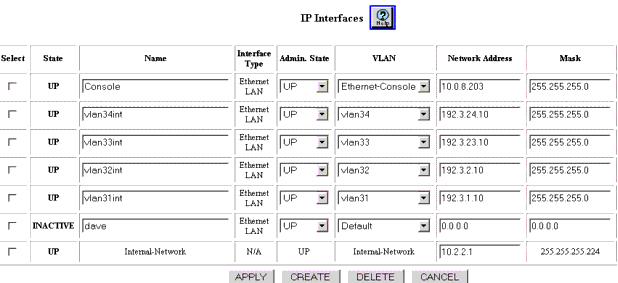
Figure 12-2. IP Interfaces Dialog Box
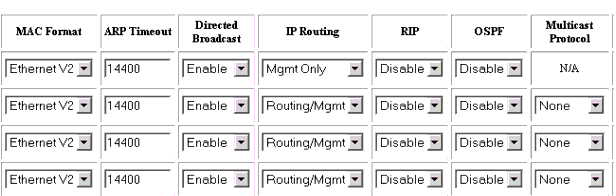
NOTE: If you modify the ARP Timeout value, the new value does not take affect when you click on APPLY.You must, in addition to changing the ARP Timeout value, change the Admin State to Down, then change the ARP Timeout value, and then change the Admin state back to Up for that Interface.
This procedure can be done when you change the ARP Timeout value. If not already selected, select Interfaces from the Routing > IP > Configuration group on the Web Agent window. The IP Interfaces dialog box opens (Figure 12-2).
Click on the Select checkbox for the Interface, change the Admin State to Down, then click on APPLY. Again select the interface, enter the new value of the ARP Timeout period, and change the Admin State parameter to UP, then click on APPLY.
|
|
|