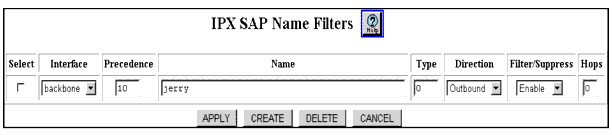
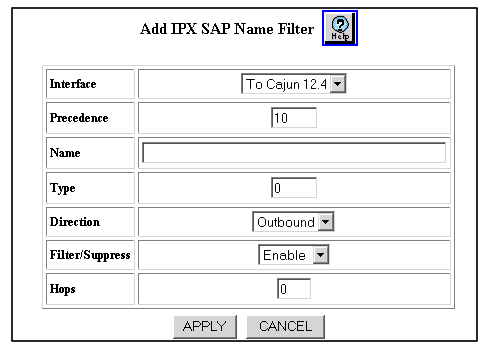
Table 18-2. IPX SAP Name Filter Dialog Box Parameters
| Parameter |
Allows you to... |
| Interface |
Select the interface to which this filter will be applied to SAP packets sent and/or received on the interface from the pull-down menu. |
| Precedence |
Enter the filter precedence (in order of importance) with 0 equal to most important.
NOTE: Note: All SAP filters on the same interface must be assigned a unique precedence value.
|
| Name |
Enter a service name. For example, FS_ENG001. A single asterisk may be present as the last character, which will match all remaining characters of a service name. |
| Type |
Enter the service type that identifies the type of service the server provides. Well-known service types include:
- Unknown (0)
- Print Queue (3)
- File Server (4)
- Job Server (5)
- Print Server (7)
- Archive Server (9)
- Remote Bridge Server (24)
- Advertising Print Server (47)
- NetWare Directory Services [NDS] (278)
A value of ffff matches all service type values. |
| Direction |
Select the filter direction from the following
pull-down menu options:
- Inbound - Applies the filter only to SAP packets received on the interface.
- Outbound - Applies the filter only to SAP packets sent on the interface (Default)
- Both - Applies the filter to SAP packets both sent and received on the interface.
|
| Filter/Suppress |
Select to enable or disable whether the services matching Name and Type are filtered (inbound) or suppressed (outbound).
- Filtered - Applies the filter only to SAP packets received (inbound direction) on the interface.
- Suppressed - Applies the filter only to SAP packets sent (outbound direction) on the interface.
Select Enable to filter/suppress traffic. Select Disable to disable the filtering and suppression of traffic.Default value is Enable. |
| Hops |
Specify the number of routers (hops) that the packet must pass through before reaching the service(s) matched by the filter. This entry is used to override the value in the SAP packet. Entering 0 ensures that there is no override in the transmission of data on the network. |
|
|