Web Agent Procedure
To create a trusted RIP neighbor using the Web Agent:
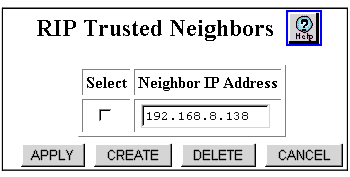
- Select Trusted Neighbors from the Routing > IP > RIP group on the Web Agent window. The RIP Trusted Neighbors dialog box opens (Figure 14-3).
- If a RIP Trusted Neighbor hasn’t been configured, only the CREATE button appears in Trusted Neighbor Dialog Box.
Figure 14-3. RIP Trusted Neighbors Dialog Box

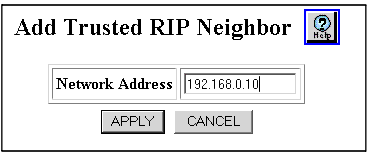
- Click CREATE. The Add Trusted RIP Neighbor dialog box opens (Figure 14-4).
- Click on the Select column checkbox for the Trusted Neighbor and click on APPLY to save your changes
- Click on the Select column checkbox for the Trusted Neighbor and click on DELETE to delete the entry or CANCEL to restore previous settings.
Figure 14-4. Add Trusted RIP Neighbors Dialog Box

- Enter the IP address for the node that acts as the trusted RIP neighbor in Network Address field.
- Click APPLY to save your changes, or CANCEL to restore previous settings.

