Administer the TN799DP��
Use Avaya Site Administration for the administration.
NOTE: The customer or design team provides the actual names, IP addresses, subnet masks, and gateway addresses. Refer to the filled-out Job Aid entitled Pre-Installation Network Worksheet for them.
- Log in as craft.
- Type list configuration all and press Enter to verify that the MultiVantage software recognizes the TN799DP circuit packs.
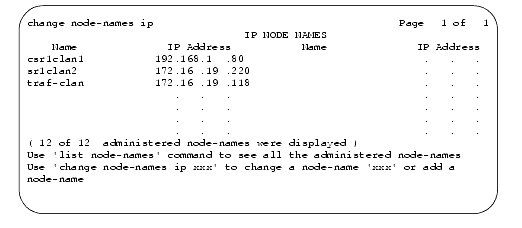
- Type change node-names and press Enter.
- On page 2, type in the node names and IP addresses for each TN799DP C-LAN circuit pack.

- Type display circuit-pack and press Enter. Verify that the TN799DP shows up in the Code column.
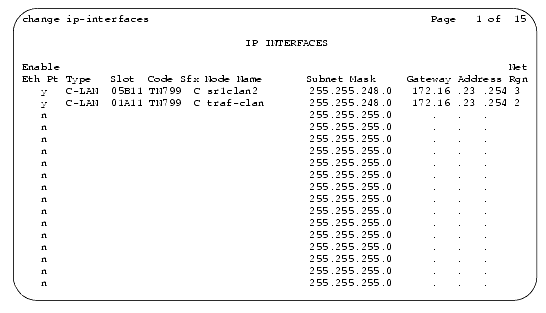
- Type change ip-interfaces and press Enter.
.

- Type in the following information:
NOTE: Enable the Ethernet port last, after you have filled in the information in the other fields.
- Set Slot field to UUCSS, where UUCSS is the cabinet, carrier, and slot.
- The Code and SFX fields are automatically populated with TN799DP.
- In the Node Name field type the same node name entered on the Node Name screen.
- In the Subnet Mask field use the default setting unless you are given a different subnet mask.
- In the Gateway Address field use the address you are given or leave blank.
- Set the Net Region field to 1 unless you are given a different number.
- Set the Enable Eth Pt field to y
- Press Enter to save the information and effect the new settings.
Refer to the Administration for Network Connectivity for Avaya MultiVantage Software for more information on these administration steps and for the steps to administer IP Softphones and H.323 trunks.

