DEFINITY Made Easy Tools
Issue 2, November 2000
Install and Administer Trunks
Mounting the 127A
- Mount the 127A vertically near the main distribution frame (MDF). The 127A case has tabs for screw-mounting and cutouts for snap-mounting the unit in a 89-type mounting bracket.
- Attach a ground wire (required) between the 127A and the MDF ground terminal bar. The wire must be green/yellow and no smaller than 0.75 mm 2 (18 AWG).
- Strip both ends of an appropriate length of wire.
- Insert one end of the wire into the MDF ground bar and secure.
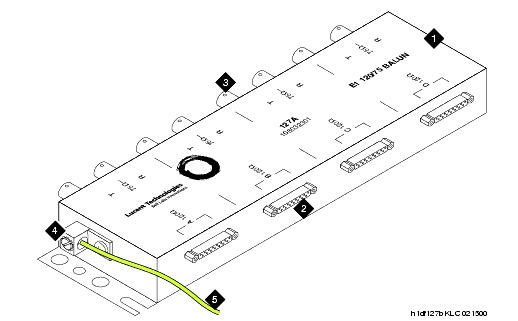
- Insert the other end into the screw-connection in the end of the 127A and secure. See 127A BALUN Coaxial Adapter.
- In Norway, Sweden, Denmark, and Finland, the 127A can be used only with MCCs or DC-powered SCCs.
- Connect the H600-348 quad cable to the 4 DB-15 connectors provided on the 127A adapter.
- Connect the transmit connectors to the connectors marked T and the receiver connectors to the connectors marked R.
- Connect the other end of the cables to whatever connects to the network.
127A BALUN Coaxial Adapter
Figure Notes:
| Copyright� 2000 Avaya Inc |
| Send comments to MadeEasy Development Team |
| Always check at the Made Easy Web site for the most current information. |
