Web Agent Procedure
To display, modify, delete a previously created IP interfaces or to create a new IP interface using the Web Agent:
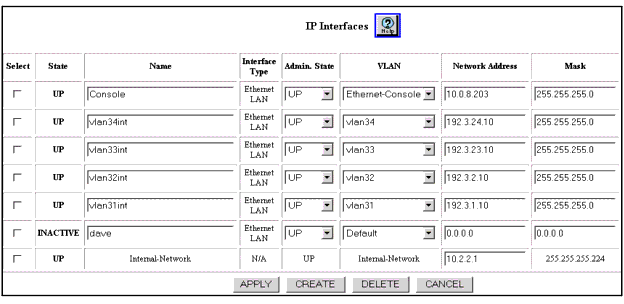
- In the navigation pane, expand the Routing > IP > Configuration folders, and then click Interfaces. The IP Interfaces Web page is displayed in the content pane. See Figure�93.
Figure�93:�IP Interfaces Web Page

- To modify an IP interface, first select the specific interface, then modify the parameters, and then click APPLY or CANCEL to restore previous settings.
Note: If you modify the ARP Timeout value, the new value does not take affect when you click APPLY. To modify the ARP Timeout setting, first change the interface Admin State to Down, then change the ARP Timeout value, and finally change the interface Admin State back to Up:
- Select the Select check box for the interface.
- Change the Admin State to Down.
- Click APPLY.
- Again select the interface, enter the new value of the ARP Timeout period.
- Change the Admin State to UP.
- Click APPLY.
- To delete an IP interface first click on Select, to select the specific interface then click on DELETE.
- See Table�62 for an explanation of the IP Interfaces Web page parameters.
