|
|
|
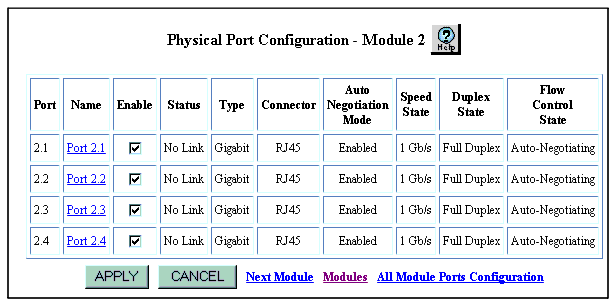
To configure ports on a gigabit module using the Web Agent:
Figure�69:�Physical Port Configuration Web Page for the Gigabit Ethernet Module

Note: If the port is already enabled (check mark is visible), and you want to disable the port, click the box to Disable the port (check mark vanishes).
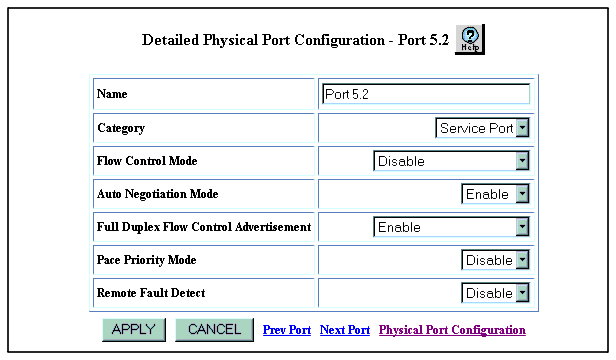
Figure�70:�Detailed Physical Port Configuration Web Page for Gigabit Port

Enable - Sets the port to both send and receive pause signals. This setting prevents buffer overflows on both local and remote port.
Disable - Sets the port to neither send or receive pause signals. Use this setting when flow control is causing congestion in other areas of the network.
Enable (Send Only) - Sets the port to only send pause signals. This setting prevents buffer overflows on the local port, but not on the remote port.
Enable (Receive Only) - Sets the port to only receive and respond to pause signals. This setting prevents buffer overflows on the remote port, but not on the local port.
Table�47 provides a more detailed description of the Detailed Physical Port parameters.
| Parameter |
Description |
|---|---|
| Name |
A user-definable name for this port (possibly a drop connection name or the name of the station or other device connected to the port). |
| Category |
The User Port option is intended for use with switch connections to end user nodes. It is intended for use with switch connections to servers or other switches. The Service Port allows the switch to generate both log messages and alarm messages (traps). The User Port only generates log messages. This prevents your network management station from being overwhelmed by port up/down messages that result from users turning workstations on and off. |
| Flow Control Mode |
This field determines if the port uses IEEE 802.3z pause control. The pause mechanism allows the port to stop a sending station from sending more packets if the buffers of the receiving port are full. Flow control helps prevent lost or dropped packets. This feature is recommended for use primarily on end station connections. Using this feature on trunk ports can cause unnecessary congestion on the network. Select one of the following options: Enable - Sets the port to both send and receive pause signals. This setting prevents buffer overflows on both local and remote port. Disable - Sets the port to neither send or receive pause signals. Use this setting when flow control is causing congestion in other areas of the network. Enable (Send Only) - Sets the port to only send pause signals. This setting prevents buffer overflows on the local port, but not on the remote port. Enable (Receive Only) - Sets the port to only receive and respond to pause signals from the remote port. This setting prevents buffer overflows on the remote port, but not on the local port |
| PACE Priority Mode |
Determines if the port detects 3Com's copyrighted PACE format as packets pass through the port. PACE allows a packet's priority (higher priority packets move through the switch faster) to be set at the adapter. |
| Remote Fault Detect |
Remote fault detection makes it possible for a Gigabit port at one end of a link to signal status to the other end of the link, even if it does not have an operational receive link. For more information on remote fault detection, see "Physical Port Features" earlier in this chapter. Note: Auto-negotiation and remote fault detection can not be enabled at the same time.Auto-negotiation must be disabled to enable remote fault detection. When auto-negotiation is enabled, remote fault detection is automatically disabled. |
|
|
|