Web Agent Procedure
To add ports to a hunt group using the Web Agent:
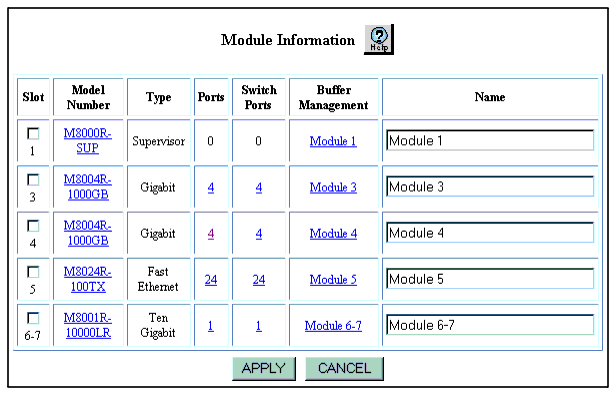
- In the navigation pane, expand the Modules and Ports folder, and then click Configuration. The Module Information Web page is displayed in the content pane. See Figure�53.
Figure�53:�Module Information Web Page
- Select a port number from the Ports column. The Physical Port Configuration Web page is displayed in the content pane. See Figure�54.
Figure�54:�Physical Port Configuration Web Page
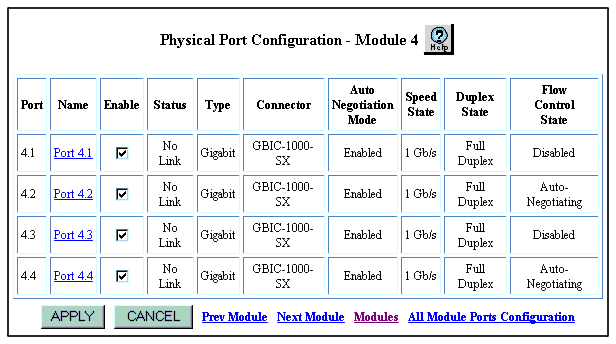
- Clear the check box from the Enable column for a specific port. The check mark disappears to disable the port.
Note: Check the speed of the ports that you are configuring into the hunt group. The ports must be physically connected to each other (for example, in a four-port Gigabit hunt group, ensure that you have four fiber cables with switch ports connected at each end).Also Auto-negotiation should be disabled on the ports to further ensure against speed mismatch
- If this is a new hunt group, disable all of the ports you are adding to the hunt group.
- If you are adding ports to an existing hunt group, disable the ports you are adding.
- Click APPLY to save your changes, or CANCEL to restore previous settings.