|
|
|
To create standard access rules:
NOTE: The IP Access List displays all standard and extended access rules that have been created. If no rules have been created, the following statement displays: No IP Access Rules are currently configured.
Due to its size, Figure 13-1 shows the Access List dialog box split in two separate sections.
The switch supports a maximum total of 512 access control rules, regardless of the number of access lists. For example, you could create the following three ACLs:
Figure 13-1. IP Access List Dialog Box
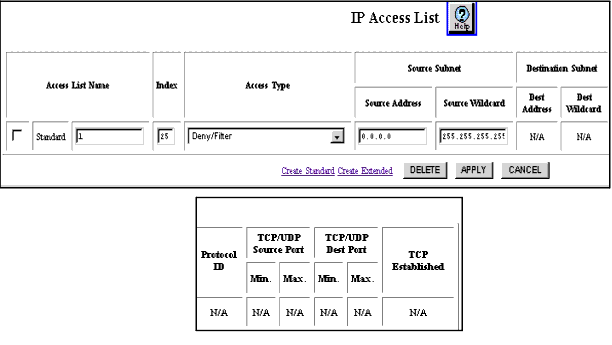
Figure 13-2. Create IP Standard Access List Dialog Box

| Parameter |
Allows you to... |
|---|---|
| Access List Name |
The Avaya Multiservice switch supports ACL names up to 32 characters (Alpha-Numeric). Spaces are allowed in the names but are not recommended. Instead of spaces, use the underscore “_” character. See “Naming Conventions for ACLs” for more information. |
| Access Rule Index |
Enter the sequence number for each new rule you create. Index numbers can be 1 through 512. Packets are compared against rules in ascending index order. NOTE: Note: Entering a new rule may override other rules. Review your current configuration prior to creating new access list rules. |
| Access Type |
Select the method of handling incoming datagrams based on the IP access type from the following pull-down menu options:
|
| Source Subnet |
|
| |
|
|
|
|