|
|
|
WARNING: Make sure there is adequate ventilation in the area. The internal room temperature must not exceed 43o C (110o F).
WARNING: Make sure the customer-supplied 19-inch, EIA 310D standard, open rack is properly installed, solidly secured to the floor, and grounded. If the rack is not secured to the floor, do not proceed with the installation. Enclosed data cabinets are not recommended, as they may not allow sufficient ventilation to the G600 Media Gateway.
WARNING: It is very important to align the media gateway with the correct holes in the frame because the distance between each may vary. To aid your installation of the media gateway, an actual size mounting template is included in the shipment, stored in the accessary compartment.
Installation requires 12 inches (30 centimeter) of clearance in the rear and 18 inches (45�centimeters) of clearance in the front for adequate ventilation, which is consistent with EIA�310D data rack standards. In a multiple media gateway configuration, the dimensions of the TDM/LAN cable require that one media gateway be mounted directly over the other (flush).
WARNING: When handling circuit packs or any components of the Avaya G600, always wear an authorized wrist ground strap connected to the ground connector provided on the system media gateway. Store circuit packs during media gateway installation such that they will not be damaged by electrostatic discharge.
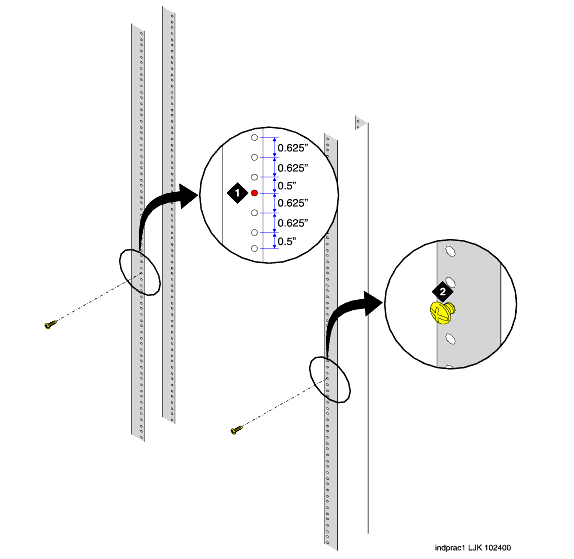
NOTE: The mounting screw holes in some commercial racks are not evenly spaced. Make sure the holes selected for mounting the media gateway are such that the rack holes match all the mounting bracket slots on the Guide. See Rack hole spacing and first mounting screws placement.
WARNING: Installing the top media gateway higher than shoulder level on the rack is not recommended.
DANGER: Use lifting precautions! An empty Avaya G600 Media Gateway weighs 35-39 pounds 16-18 kilograms).
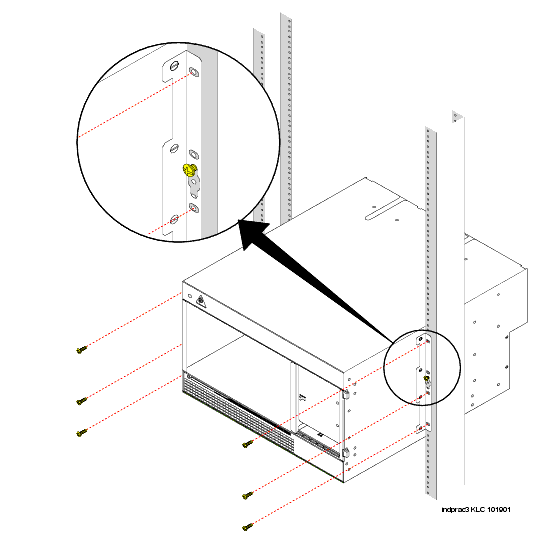
NOTE: Follow the same steps to install the media gateway with mounting bracket in the medial position. See Mounting the media gateway in medial position..
Rack hole spacing and first mounting screws placement
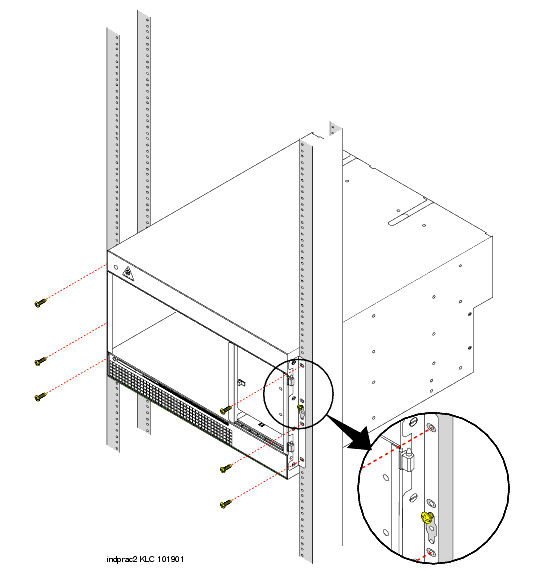
Mounting the media gateway in medial position.
|
|
|