The purpose of this article is to demonstrate how a Customer can provision multiple users to receive Company faxes and Company SMS messages using a Message-Only Extension.
1. Log in to Avaya Web Portal - (service.cloudoffice.avaya.com)as an Administrator
2.Create a Message Only Extension go to \Phone System \Groups \Others and select +New Message only Extension
A) set the Site
B) Extension Name
C) Extension
D) and the Managing Email Address
And click Save
3. Open the newly created Message Only Extension. Select Messages & Notifications \ Settings and click Edit for Notifications
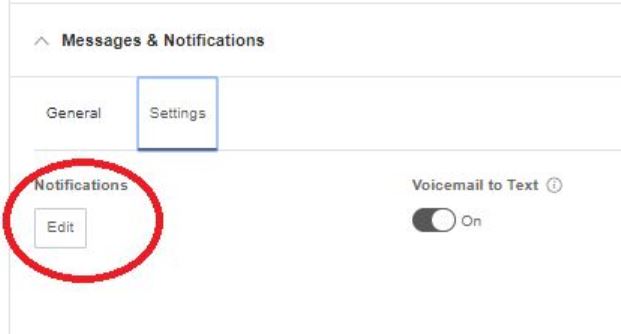
4. Enable "By Email" for Received Faxes, Received Text Messages and enable "By SMS" for Received Text Messages
a) To send faxes to multiple users - In Sent Notifications to Email enter the desired email addresses separate by a Semi-Colon and click Save ([email protected] ; [email protected])
b) To send SMS messages to multiple users Select Carrier enter the details for Cell phone Carries and Phone number and click Add . Each cell number will need to be entered separately, and click Save
5. Assign the newly created Message Only Extension to your Company Fax / SMS Number. Go to Phone System \ Auto-Receptionist \ General Settings \ IVR Settings \ "Company Fax / SMS Recipient " select the newly created extension, and click Save
***After the Message Only Extension is created the Extension must be activated:
Go to \Phone System \Groups \Others and select the newly created Message only Extension
Select Message-Only Extension Details Verify the Email address and click Send Invite
the user will recieve a Activation email and can update the Password, PIN and Security Question.
To Access the Message only Voice Mail connect to Sevice.cloudoffice.avaya.com using the Main number and Extension and password to retrieve and delete Voice mails / Faxes