On-Premise Exchange accounts indicate that Exchange server(s) are kept on-premises. You can install the Avaya Cloud Office Scheduler add-in for your organization using the Exchange Admin Center (EAC) or the Exchange Management Shell.
Note: Avaya Cloud Office Scheduler supports On-Premise Exchange 2013, 2016, and 2019.
Installing the add-in via EAC:
1. In the EAC, navigate to Organization > Add-ins.
2. Click New +, and choose where you want to install the add-in from:
- Add from the Office Store
- Add from URL
- Add from file
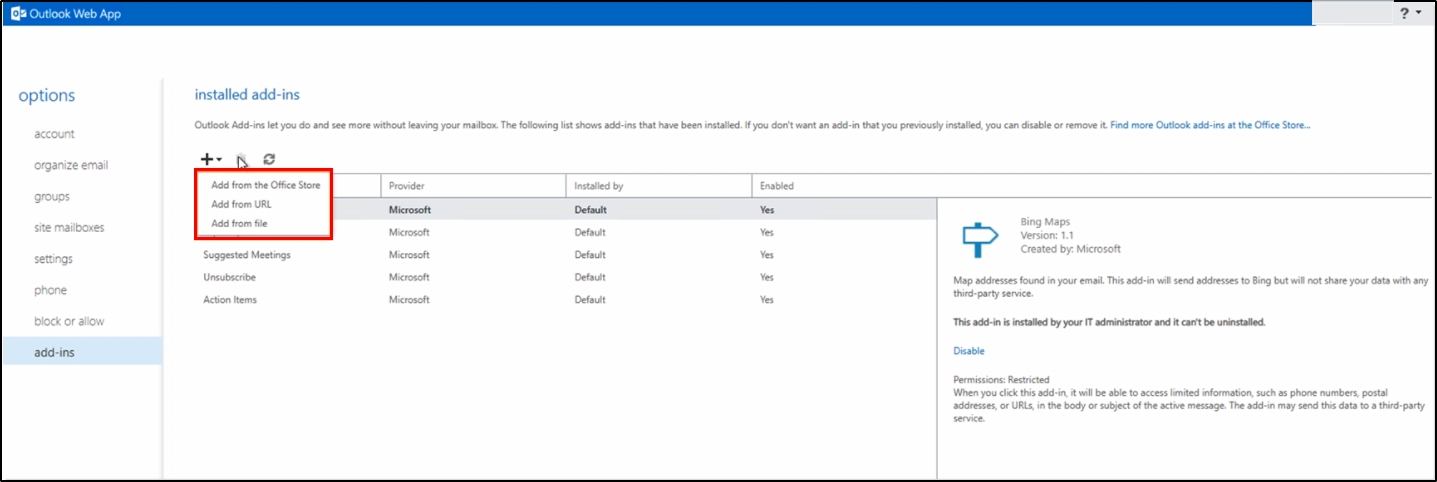
3. Click Save.
Where to find the add-in:
- Add from the Office Store: At the Office Store, select the app you want to install, and then click Add. Apps that work with the Outlook web app are listed under Add-ins for Office and SharePoint > Outlook.
- Add from URL: In the URL, enter the full URL for the add-in manifest file that you want to install. This is the add-in manifest file: “https://apps.ringcentral.com/integration/office-add-ins/prod/avaya/manifest.xml”
- Add from file: Select Browse and navigate to the location of the add-in manifest file that you want to install. You can use the manifest link above to generate the manifest file. Open the link in any browser. From the browser body window, right-click and select Save As....
Installing the add-in via Exchange Management Shell:
You can install the add-in by inputting either of the following commands:
- Add in from a file: “New-App -OrganizationApp -FileData <File location for add-in manifest file>”
- You can use the manifest link above to generate the manifest file. Open the link on any browser. From the browser body window, right-click and select Save As....
Related Articles
Avaya Cloud Office: Introduction to Avaya Cloud Office Scheduler Outlook add-in
https://onecare.avaya.com/AvayaCloudOffice/kb/public/DOCS100955
Avaya Cloud Office: Installing Avaya Cloud Office Scheduler Outlook add-in as a user
https://onecare.avaya.com/AvayaCloudOffice/kb/public/DOCS100957
Avaya Cloud Office: Deploying Avaya Cloud Office Scheduler Outlook add-in to users using the add-in store from Office 365 admin center
https://onecare.avaya.com/AvayaCloudOffice/kb/public/DOCS100956
Avaya Cloud Office : Deploying Avaya Cloud Office Scheduler Outlook add-in to users with XML file from Office 365 admin center
https://onecare.avaya.com/AvayaCloudOffice/kb/public/DOCS100960
Avaya Cloud Office: Using the Avaya Cloud Office Scheduler Outlook Add-In to schedule video meetings
https://onecare.avaya.com/AvayaCloudOffice/kb/public/DOCS100958
Avaya Cloud Office: Setting delegates to schedule your Avaya Cloud Office video meetings on Avaya Cloud app desktop and web
https://onecare.avaya.com/AvayaCloudOffice/kb/public/DOCS100959
Avaya Cloud Office : Setting a delegate to schedule a meeting on your behalf in Outlook
https://onecare.avaya.com/AvayaCloudOffice/kb/public/DOCS100962