General info to provide with logs collected:
a. time period when issue reproduced
b. display name of the participants
c. display name of the participant(s) for whom the issue reproduced
PC: Collecting Client Logs on a PC - Call Logs, and ScreenLink Logs - Installer and Scopia Launcher Logs - Web Collaboration Client Logs - System Event Viewer Logs
Mac: Collecting Client Logs on a Mac - Call Logs, ScreenLink Logs, and Scopia Launcher Logs - Installer Logs - Web Collaboration Client Logs
Collecting Client Logs on a PC
PC: Call Logs, and ScreenLink Logs
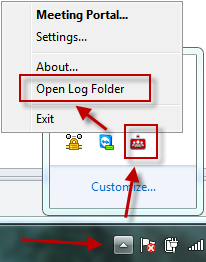
1. Right-click on the client in the system tray, then click “Open Log Folder”
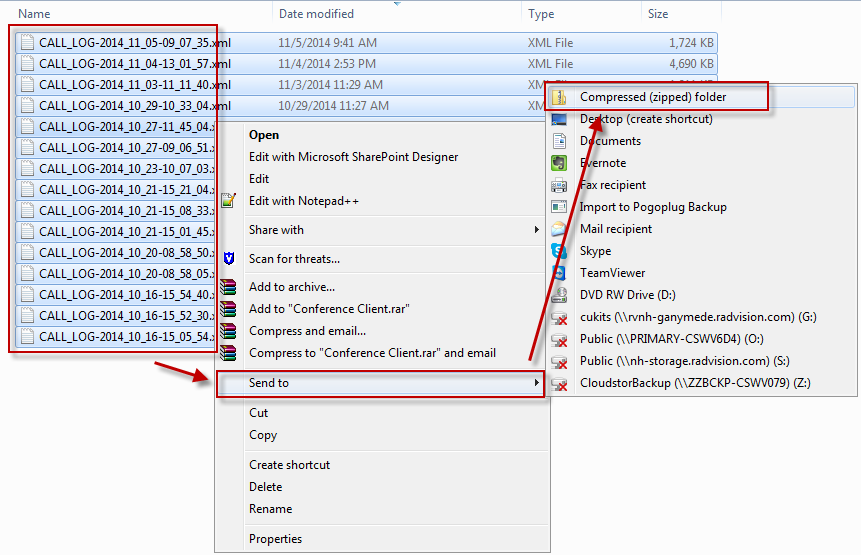
2. Select all files, Right-click on the highlighted files, then click “Send to -> Compressed (zipped) folder”
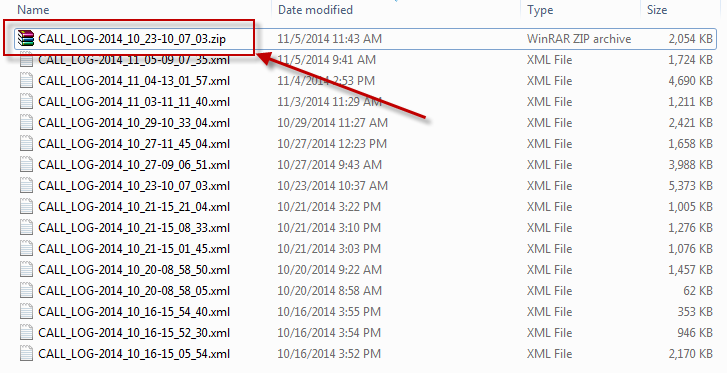
3. Send the .zip file which was created in the previous step
PC: Installer and Scopia Launcher Logs
The Scopia Launcher logs are located in the C:\Users\<your user name>\AppData\Local\Radvision\Installer\Logs directory. Follow steps 2 and 3 from the Call Logs instructions above to zip and send the full contents of the C:\Users\<your user name>\AppData\Local\Radvision\Installer\Logs directory.
PC: Web Collaboration Client Logs
Collect the Web Collaboration Client Log (If files are present. If not, please indicate the files were not present when providing the logs)
1. Open %temp%/awcp in Windows Explorer.
2. Open C:\Users\<your username>\AppData\LocalLow\Avaya\AWCP
4. Collect all the files with the string "log" in the filename or file extension (e.g tunnel.log.*, loader.log.*, aac_jre_plugin.log) from both directories
PC: System Event Viewer Logs
In addition to providing the call logs and collaboration logs, the system event viewer logs should be provided: FAQ106960
Collecting Client Logs on a Mac
Mac: Call Logs, ScreenLink Logs, and Scopia Launcher Logs
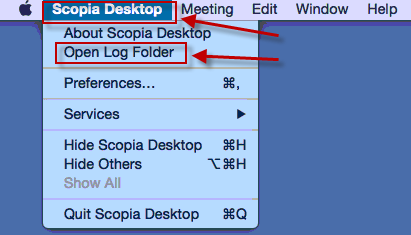
1. Click on the Scopia icon in the Mac icon bar at the top then select Open Log Folder. If icon is present, then skip steps 2 and 3, otherwise follow steps 2 and 3.
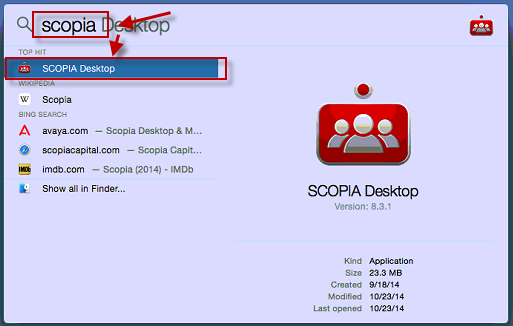
2. Type “Scopia” in spotlight, then double-click on the Scopia Desktop App
3. Click the “Scopia Desktop” menu, then click “Open Log Folder” (This will open ~/Library/Logs/Scopia Desktop)
4. Select all files, Right-click on the highlighted files, then click “Compress <n> Items”
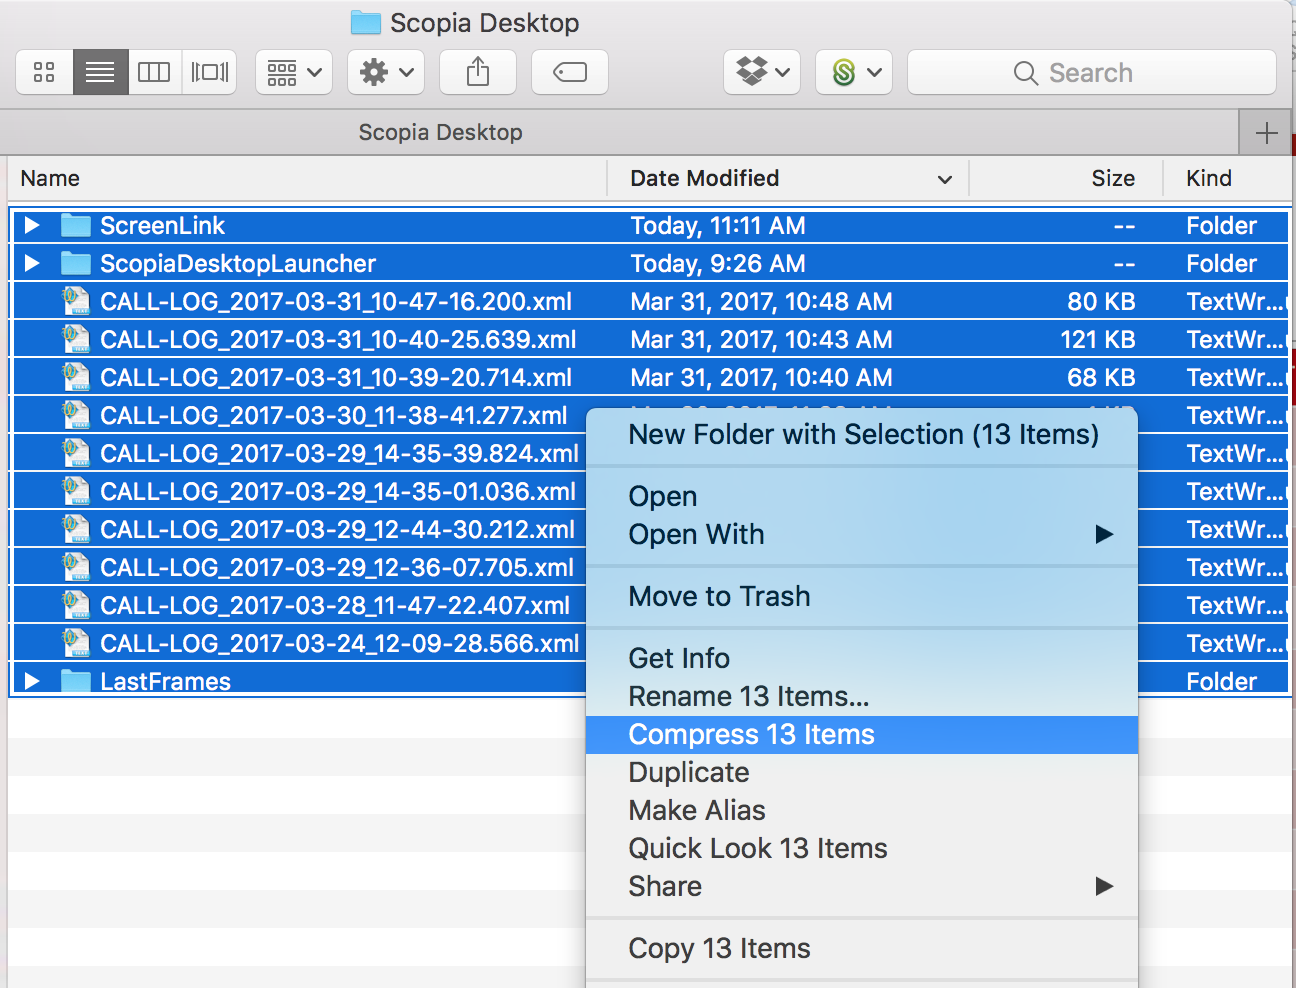
5. Send the .zip file which was created in the previous step

Installer Logs
If problems with the pkg installation of the Client are being experienced, the following process can be used to gather the pkg installer logs.
To collect install logs:
1. Run SCOPIADesktopComponents.pkg
2. Go through all the installation steps until successful/unsuccessful window appears... do not close it.
3. Click on the “Window" button on the top menu bar.
4. Select the “Installer Log”
5. Change “Show Errors Only” in the pull-down menu to “Show All Logs”
6. Press the “Save” button
Mac: Web Collaboration Client Logs
Also collect the Web Collaboration Client Logs (If files are present. If not, please indicate the files were not present when providing the logs)
1. Web Collaboration Client (WCC) and Avaya Web Collaboration Plugin logs
i. Open Terminal application and run echo $TMPDIR command. It will print the temporary directory location for the current user:
mac-name:~ username$ echo $TMPDIR
/var/folders/5j/bjq0x2vx3w5f7jgp1q_4wpwh0000gn/T/
ii. Go to that temporary directory
iii. Go to awcp directory inside of temporary directory
iv. Collect all the files in this directory
2. To collect Sharing Application logs:
i. Go to /Users/<your username>/Library/Application\Support/Avaya/AWCP
ii. Collect all the files with log string in the filename (e.g tunnel.log.*, loader.log.*, aac_jre_plugin.log) in this directory
An alternative way to collect the Web Collaboration client logs if the above way doesn't work:
1. Click on the Launchpad on the dock bar and search for terminal, click and launch the terminal
2. On the terminal prompt type (copy&paste) the following commands:
cd $TMPDIR/awcp/
cp *.* /Users/$USER/Downloads/.
cd /Users/$USER/Library/Application\ Support/Avaya/AWCP
cp *.* /Users/$USER/Downloads/.
3. Launch the finder and go to the Downloads directory – zip and send the files copied (Date/Time of the files to collect should match the time you typed the above commands).
