DEFINITY Made Easy Tools
Issue 3, December 2001
Install and Wire Telephone Power Supply
Mount the 1146B Power Distribution Unit
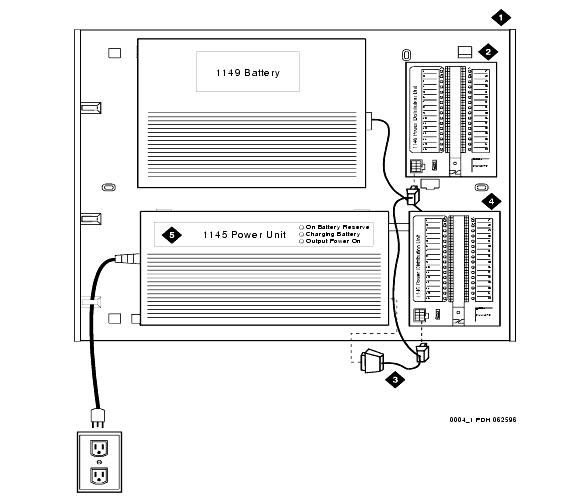
See the 1146B Power Distribution Unit in Expanded Power Distribution Unit.
- Insert and securely tighten the two supplied #8-32 x 1/2-inch shoulder screws (they have an unthreaded section at the top) into the top holes designated for 1146B Power Distribution Unit on the bottom plate. Mount the unit on these two shoulder screws, using the key holes on the back of the unit.
- Secure the unit by inserting the #8-32 x 1 inch screw through the bottom of the unit (just above the wire clips) into the plate and tighten.
- Set the battery back-up switch option to the 1-32 (down) position to provide battery back-up to all outputs.
- Connect the power distribution unit to the power supply with the power cable. Refer to the power supply's right-hand label to locate the output power connection.
Expanded Power Distribution Unit
Figure Notes:
| Copyright� 2001 Avaya Inc. |
| Send comments to MadeEasy Development Team |
| Always check at the Made Easy Web site for the most current information. |
