DEFINITY Made Easy Home Page Table of contents Previous page Next page Index Links Frequently asked questions
Go to Upgrades for R9 Go to Installation for MCC Go to Installation for SCC


Remove tape drive [75 small upgrade]

Return to Task List


Note: The tape drive does not have to be physically removed at this time. You can disconnect it now, and then remove it after you complete the upgrade and time is less critical.

  1. Remove the tape.

  2. Disconnect the AHF4 cable adapter from behind slot 07 of control carrier A (see R1V3 System 75 cabinet).

  3. Open the snap connectors to remove the adapter from the tape drive's ribbon cable. Route the cable back to the tape drive and remove it. (There are 2 cable clamps on the cabinet's side panel. Use a screwdriver to unsnap them.)

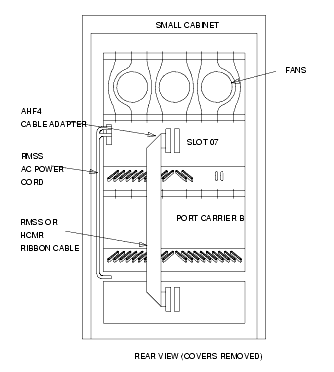
  4. Neither the cable nor the adapter will be used in the upgraded cabinet.

  5. Disconnect and remove the tape drive.

  6. Coil the red and black wire in an out-of-the-way position in the cabinet.

  7. Install the 176A Apparatus Blank over the empty space left by the removal of the tape drive.

R1V3 System 75 cabinet

Return to Task List


DEFINITY Made Easy Home Page Table of contents Previous page Next page Index Links Frequently asked questions
Go to Upgrades for R9 Go to Installation for MCC Go to Installation for SCC
Copyright 2000 Avaya Inc
Send comments to MadeEasy Development Team


Always check at the Made Easy Web site for the most current information.