DEFINITY Made Easy Tools
Issue 3, December 2001
Install and Administer Trunks
Adding the Trunks
- At the prompt, type add trunk next and press Enter.
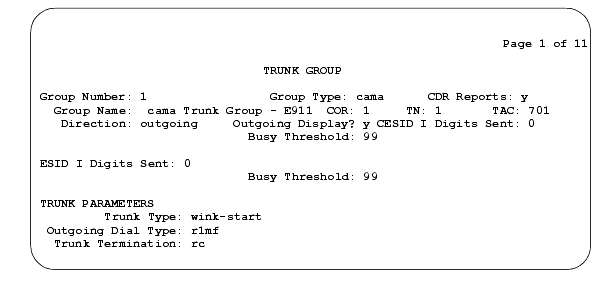
- On the Trunk Group screen CAMA Trunk Group form (page 1), in the Group Type: field, enter cama.
- In the Group Name: field, enter the desired name.
- In the TAC: field, enter the desired trunk access code.
- In the Outgoing Display: field, enter y.
- In the CESID I Digits Sent: field, enter the number directed by the Central Office (CO) or the Public Safety Answering Point (PSAP).
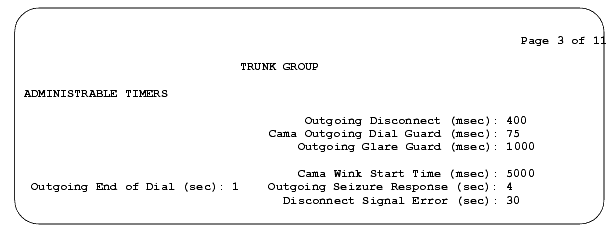
- Scroll to Administrable Timers form (page 3).
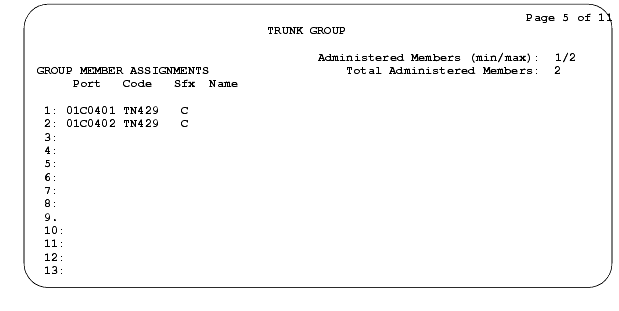
- On the Administrable Timers screen (page 3), you may need to adjust these fields according to your CO. Scroll to Group Member Assignments form (page 5).
- On the Group Member Assignments screen, in the Port field, add the trunk members and press Enter when finished.
CAMA Trunk Group form (page 1)
Administrable Timers form (page 3)
Group Member Assignments form (page 5)
| Copyright� 2001 Avaya Inc. |
| Send comments to MadeEasy Development Team |
| Always check at the Made Easy Web site for the most current information. |