DEFINITY Made Easy Tools
Issue 3, December 2001
Install Fiber Optic Cable Pass-Thru Kit (Single-Carrier Cabinets)
DEFINITY Made Easy Tools
Issue 3, December 2001
Install Fiber Optic Cable Pass-Thru Kit (Single-Carrier Cabinets)
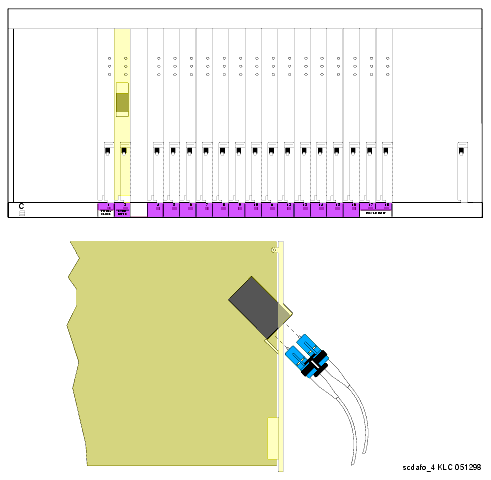
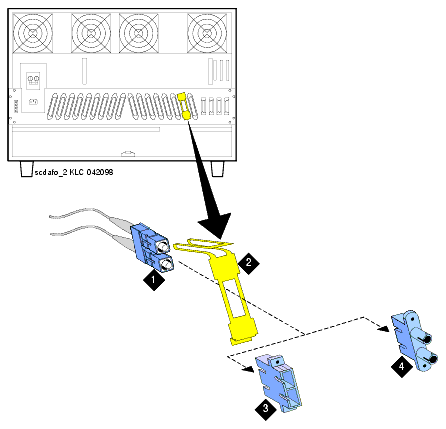
Use the beige adapter even if single-mode fiber is being installed. The beige adapter is better suited for cable routing in the next steps.
If single-mode fiber is being installed, the beige adapter will be replaced with a blue adapter later.
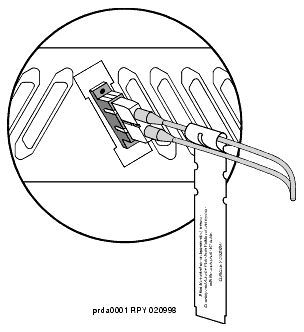
| Caution! | Avoid bending fiber optic cables to a radius smaller than 1.5 inches (3.8 cm), to prevent mechanical stress on the cables. |
| Note: | For a duplicated system, use the pass-thru tool to bring 1 end of the cable to the front of each cabinet containing the duplication interface circuit packs. Connect the fiber cable to the duplication interface circuit pack in each carrier. Do not remove the I/O connector adaptor (referred to in steps 9 through 12 of this procedure). See Install fiber optic cable for duplicated SCC systems for illustrations of this process. |
Avoid bending fiber optic cables to a radius smaller than 1.5 inches (3.8 cm), to prevent mechanical stress on the cables. Plan the use of cable ties to avoid crimping the cable or creating a fixed stress point where, at a later time, movement of the cable causes it to exceed the minimum bend radius.
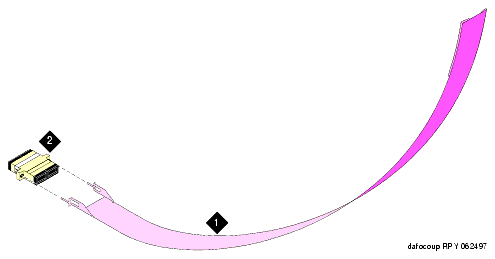
Fiber optic adapter and pass-thru tool
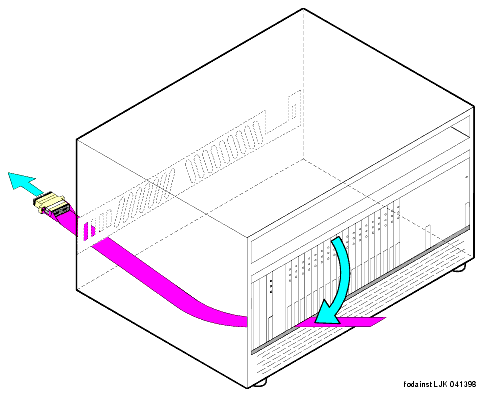
Insert the pass-thru tool
Fiber Optic Cable and Adapter
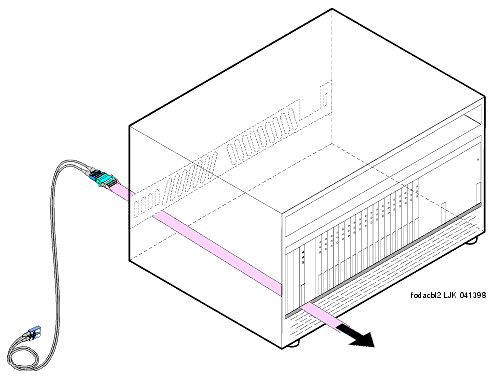
Connect fiber cable to circuit pack
Bracket Attachments
Cable Disconnect Label
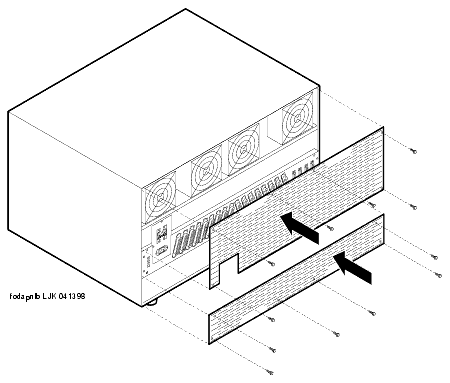
Install the rear panels
| Copyright� 2001 Avaya Inc. |
| Send comments to MadeEasy Development Team |
| Always check at the Made Easy Web site for the most current information. |